
New Building ~ Stone, Siding and Some Changes...
I've gotta get this #fixerupperfriday post done asap or it'll have to be #fixeruppersaturday and that just sounds silly, lol!
I have been swamped with sessions (that's a great thing!) and that always comes first so finding time to get this done before now has been a challenge. In fact, I headed out bright and early this morning to hold a bitty one week old baby girl and take lots of photos of her 😍 We came up with some adorable set-ups and I LOVE the keepsake box she will be getting. I can't wait to create it!
After doing the session with Baby K, I had to jet off to Pflugerville to go see the guys at Timbertown Austin. I really liked the siding that Panda Express has and searched forever to finally find out what it was. It's a product called Fiberon. It's a composite cladding so there is no need for staining year after year. It's much pricier than wood or hardi plank but it's the only thing I could find that had that smooth modern look to it. Wood and hardi had way too much grain. They were both very rustic, a no in my book. Not for this design anyway.
The guys at Timbertown have been super helpful. When I got there, Michael walked me through the samples and we took them out to the car to check them against the "sorta sample" I had of the stone. It's not identical but it is pretty close. "Horizon" is the pattern and "Ipe" is the color. I'm sooo glad I went all the way there. You can try to match via photos but sometimes you'll need to ask questions as you're there so I always recommend taking the time to make sure you know what you're getting.
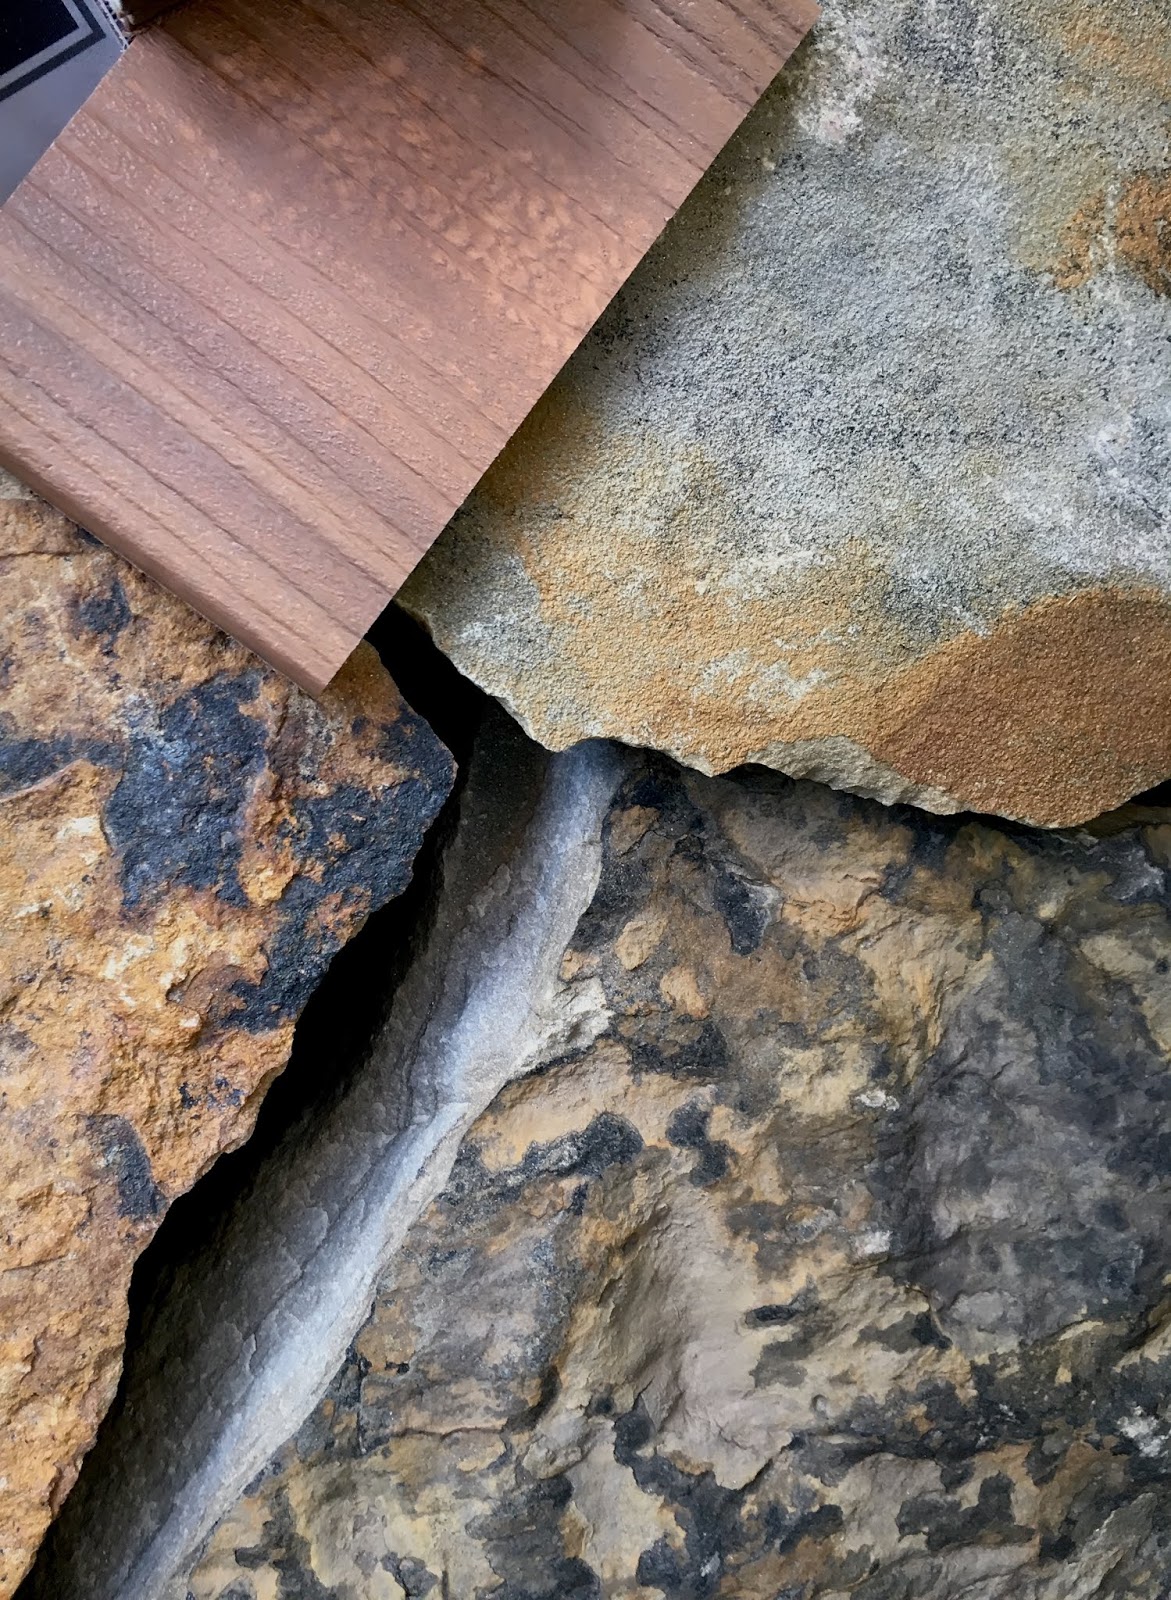

This stuff is pretty expensive so we changed things a bit. We are now going to do white stucco on the back and the two sides of the building. Only the front will have the Fiberon. Now, I'm giving fair warning that this mock up is kinda.... well, let's just say it could be much better but I had to do it fast. The siding will actually be made of thinner planks and this isn't the fully installed stone, just my attempt to copy paste what was there 😜 You get the idea though...

The main update is that the stone wainscot is up. There was quite a discussion about how it was supposed to be installed. The gentleman at ESI Stone told me that you should add additional moisture barrier (Tyvek can work but it can tear and get holes in it) and you need to either put brick ties on the wall (every 16") and have an air gap of 1" if putting mortar between the stones, or use metal lathe (looks like chicken wire attached to the wall) then you apply mortar to the back of the stone and that gets pushed into the lathe to hold the stone in place for a dry stack.
We wanted a dry stack look so I was under the impression we were supposed to use the lathe method. I was told they were not using lathe but they were going to leave the air gap and do ties. Since I understood that is normally the process when you are doing mortar in between the stones, of which we aren't doing, I was concerned. After seeing the stone application, I noticed there was no air gap so I asked about it and the lack of ties (of which I've not seen on any walls or on the ground or in a bucket, etc). He explained that they were installing it according to "industry standard" and it's guaranteed.
We actually popped by the building on Father's Day Sunday, planning on getting some measurements for the sink vanity and hoping to get a few photos for this post and the crew was there installing the stone. We decided to pull in next door to not get in their way (not much parking with all the work trucks and dumpster anyway, lol!). We were discussing whether we should try to get photos and measurements or just leave and come back another time when I noticed how they were installing the stone. Needless to say, I still don't understand how the stones hold to the Tyvek. Maybe it's just me but setting a stone down and throwing (for lack of a better word, this is basically how it was done) mortar behind it just doesn't seem super secure. Hopefully with only a wainscot of stone, we'll be ok. Heck, the brick veneer that was there before wasn't held to the wall by ANY ties and had been in place since the 70's. This must be better than that right, lol!


Here's a pullback of the stone after almost a complete install. We discovered that we can't really turn any of this stone to create a cap like they normally would because it's 4" chopped on all sides. Because of this, we have decided to not put a cap but just run the stone up to the flashing. The guy at ESI said it was fine but that we needed to run caulk between the flashing and the stone. I asked him about doing mortar and he said that mortar sucks up water so we need to keep it as free from that as possible. Not to mention, caulk is flexible where mortar isn't. Cracking and splitting with mortar is a very possible scenario.


So there you have it. I'm currently trying to get a copy of the updated budget so I know what I can spend on certain things. I'm ready to do some shopping!!!
Things I've learned this week.
- 1. Educate yourself.
- 2. Then do it some more. Google isn't enough sometimes. I searched for hours to try to find the right way to install the stone. Most of what I saw was for a thin veneer or a composite stone which is not what we have. I'm still trying to get a clear understanding of this whole stone thing.
- 3. Do not grow weary. This too shall pass.
- 4. Keep trusting Jesus. No matter what things look like.
Have a FAB weekend! I get to go hang with my sis, get a facial, check out the new stuff at the domain and eat dinner. I also get to show her my niece's first round of senior photos (will share later). I'll be doing more this fall at the Domain. Scouting the location is gonna be a blast!
His eye is on the sparrow and I know He is watching over me. ♥ Matthew 10:29-31


Comments
Post a Comment